Saturday, January 28, 2012

Don't ya just LOVE Vintage?

Don't ya just love anything vintage? I know I do and I am IN LOVE with these Vintage-Looking Flower Pins that I just created for my shop
The whole time I was making these beauties I was oohing and awhing to myself! It is amazing watching fabric transform into something- something that you made with your own two hands. Ok- it is amazing watching ANYTHING transform into something that you made with your own two hands. 
Especially when you are the designer and the design in your head turns out as great in person as you had hoped. Usually before I go to work on something I go though a long thought process involving a lot of planning until I can pretty much picture the end result before I even start making the object.

I have seen these type of flower pins done in so many ways using anything from felt to cotton to chiffon- you name it, someone has done it! These pretties are made from chiffon. I saw this technique done at Stampin Up! Regionals and was so impressed that I stopped at Hobby Lobby on my way home to buy some chiffon. I did make it my own by adding the lace to some and using a different die than demonstrated but did the same layering and shaping technique as instructed. And I have also made these darling flowers before using cotton and felt but this was my first time to get my hands on chiffon and start experimenting. I love how one basic concept or idea can be transformed in so many different ways depending on the person doing it. God has made us all unique like that. My flower pin would never look quite like any other person's because we all have our own special touches and special ways of doing things.

Have a fabulous Saturday evening, friends and if you have a chance, don't forget to stop by and check these pretties out! I'm in love!

Christina

Wednesday, January 25, 2012

Valentine's Decor- Kiddie-Style


We've been busy here during the past couple of day doing some fun Valentine's Day home decor. Yesterday my 3 oldest cuties made these cute tea light holders out of random jars from the recycle bin, lots of glue and tissue paper. 
We lined them down the center of our dinner table for a pretty little center piece. It makes me very happy seeing them everyday!

IN LOVE!
 One of today's projects were these hand-sewn felt hearts. This they had some trouble with- I guess they are a bit too young but they still had a blast trying. They did eventually finish but had some trouble. This idea also came from Amy over at BlissfulBlooms. 
I love seeing all of the hard work they put into them. Their random stitches are so sweet looking.
We will cherish these forever!

And since Wednesday's are our day off from school, we managed to fit in a second project! For this project I sewed some 4" X 5" burlap flags during naptime and when they woke up, they stamped red and pink hearts on the flags using a potato stamp.
I must say I am completely impressed with how well these turned out. They did an awesome job! Short of making sure the potato was "inked" up well with paint and helped them put enough pressure down onto the burlap, they did this on their own. After the felt heart project in the morning, I didn't expect this to go so well. I figured at least a few of the hearts would be halfway off the fag, upside down- but nope, these look pretty perfect to me!

I decided to hang these on our wedding pictures. I thought the hearts were very fitting for such a loving day and marriage that we have and also love the idea behind the fact that our beautiful children, who are a product of our loving marriage stamped these with their own little hands. I might just leave it up year around!

 Have you ever made potato stamps? This was our first time, too. It was so easy to do and such a neat idea. I pressed a heart shaped cookie cutter down into the potato and then using a paring knife I cut around the potato until the knife hit the cookie cutter. Pull the cookie cutter out of the potato, slice it flat across the top and you are left with a heart! This idea came from Homemade Serenity. We just stamped it on burlap instead of paper.


Have a quiet evening, friends!

Christina

Tuesday, January 17, 2012

Stampin Up! Regional Swap 2012

Let the count down begin- in 4 days I'll be at the Stampin Up! 2012 Regional in San Antonio, Texas as a guest and I am sooooo excited! I've never been to any major Stampin Up! event before but from what I have heard, read and seen in pictures, it should be an awesome experience!

One of the many exciting things that happens at these events are swaps- sign me up! I created a darling card with an adorable little girl on it, lots of layers of paper, a couple off punches and some dsp ruffled using my sewing machine. (that part was a cinch, no worries!)

Supplies used to make this card (all Stampin Up! products):

*Crumb Cake card stock- cut at 5-1/2" X 8-1/2" for the base of the card (fold in half to create a 4-1/4" X 5-1/2" card)
*Early Espresso card stock- cut at 2-3/4" X 3"
*Pink Pirouette card stock- cut at 2-1/4" X 2-1/2"
*Whisper White card stock- torn with tearing edge to approx. 2" X 2-1/4" (stamp the image of the cute girl first and then use the tearing edge to tear around her)
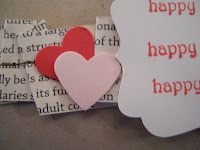
*Whisper White card stock punched with the Decorative Label Punch and stamped with the "happy valentine's day" stamp from Teeny Tiny Wishes in Real Red Classic ink and popped up with dimensionals
*Cute little girl stamp is from the stamp set called "Greeting Card Kids" and stamped in black StazOn ink
*Little girl is colored with markers in Pretty in pink for her bows on her dress, hair and socks, Pink Pirouette for her dress, So Saffron for her hair, Real Red for the heart she is holding and her skin tone is Blush Blossom
*2 hearts punched with Small Heart Punch in Real Red and Pink Pirouette card stock
*Ruffled "First Edition" dsp paper sewn with a sewing machine threaded with dark brown thread

Ruffling the paper was pretty easy. I cut a strip of the First Edition DSP at about 3/4" wide by 12" long and very quickly pushed it through the sewing machine. If you push it through faster than the machine is going, it will ruffle up and over-lap on itself- a fun technique that I've used before, just never on DSP! I LOVE how it turned out.


So there you go- all of the details on how to make this sweet little card! I hope everyone I love will love it this Valentine's Day as much as I do!

Happy Stampin'

Christina

Monday, January 16, 2012

{HOME}

It is early in the morning and my husband is off to work, my children are watching a cartoon before breakfast and I'm finishing up my 1st cup of coffee. I love this time off the day when things are still pretty calm around here. But soon the day will take off, school will start at our dining room table, the day's cleaning will be done and lunches made all before naptime in the afternoon when it will be quite again. So ya, I like mornings, even though I'm not a huge morning person. Sleeping in is always nice but there is something about the calmness of the morning that I love so much.

I've been dreaming about my new etsy line, coming up with ideas and plans and making them happen. It is so much fun to dream and then see it come true. Isn't the picture above inviting? The warm plaid and felt all mixed together to create this yummy little piece? I think so. It is just one of the new items coming soon (hopefully by tonight!) to my shop. Stop by if you can and check it out. I think it will be something that you will want to take home with you.

Happy Monday Friends!

Christina

Thursday, January 12, 2012

My Christmas Home (a little late!)

I didn't realized until after Christmas that I hadn't taken any pictures of our house all decorated for Christmas. It actually worked out well that way since after Christmas we decided it was time to get a new camera. Our old one was old and just wasn't taking the best pictures anymore so it was the perfect opportunity to play around with our new camera and take some nice pictures.

I love how Christmas tree lights look in the evening after the sun goes down. So pretty!
My Stampin Up! Christmas Keepsake Box that I made from a kit that they were selling. Everything came pre-cut and I just had to assemble it. So much fun!
An ornament on our tree. I love that it is handmade and love the plaid!
This is our Advent Calendar that we have used for the past 3 or 4 years. I saw the idea is Southern Living's Christmas Book and made one for our family. We look forward to putting it up every year, and hanging an ornament on the bags as the days go by.
Our 3 oldest kiddos made these cute gingerbread houses. I love how they turned out. We decided not to buy a kit this year and make our own so they could all make their own house without spending a lot off $$.
This beautiful tiered Nativity Scene was our newest addition this year. We received it as a gift from the boy's Godmother. When you light the tea lights, the heat makes the "fan" on top spin. Love it!
And last but not least, this is our 12 Days of Christmas Tree, a new tradition that we started this year. Since the season of Christmas doesn't start until Christmas Day and lasts for 12 days, we found this cute set of ornaments at Target and put one on the tree for each of the 12 Days of Christmas. And to turn it into a teaching opportunity, we explained the hidden meaning of each of the 12 days to our children. (For example A Partridge in a Pear Tree really stood for Jesus, 2 turtle doves were the old and new testaments and so on.)

The only thing (also a new tradition) I don't have a picture of is of our Jesse Tree. We bought handmade ornaments and during each of the 28 days of Advent we put an ornament on the tree (same tree as the 12 days of Christmas Tree) and read a bible story about it. Each ornament tells bible stories starting with the old testament up until Jesus' was born.)

Merry (late) Christmas and Happy New Year!

Sunday, January 8, 2012

Happy New Year and Laundry!

Happy 2012 everyone! I hope everyone is having a wonderful year so far. I know I am. I'm as busy as ever keeping up with my cuties and household duties but that is the life God has given me so I try my hardest to remember that when things get a little too crazy.

Before we ever even hit the January 1st mark I started thinking more and more about the areas of our home that need some extra attention. I am the type of person that doesn't like clutter and gets overwhelmed when things start to pile up. So I guess you can say my Spring Cleaning has started early this year. (I'm okay with that!)

A few months ago I decided to give homemade laundry soap a try and must say it works great! Our clothes are just as clean, if not cleaner, than with store bought brands. The best part? We are saving a ton of money and it isn't full of harsh chemicals like other brands are.

Duggar Family Recipe
Want to make your one? Here is the recipe. And to give credit where credit is due, this is from the Duggar's website at http://duggarfamily.com/

So, here is the recipe- try it out, you will love it, too!

4  Cups - hot tap water
1  Fels-Naptha soap bar
1 Cup - Arm & Hammer Super Washing Soda*
½ Cup Borax

- Grate bar of soap and add to saucepan with water. Stir continually over medium-low heat until soap dissolves and is melted.
-Fill a 5 gallon bucket half full of hot tap water. Add melted soap, washing soda and Borax. Stir well until all powder is dissolved. Fill bucket to top with more hot water. Stir, cover and let sit overnight to thicken.
-Stir and fill a used, clean, laundry soap dispenser half full with soap and then fill rest of way with water. Shake before each use. (will gel)
-Optional: You can add 10-15 drops of essential oil per 2 gallons. Add once soap has cooled. Ideas: lavender, rosemary, tea tree oil.
-Yield: Liquid soap recipe makes 10 gallons.
-Top Load Machine- 5/8 Cup per load (Approx. 180 loads)
-Front Load Machines- ¼ Cup per load (Approx. 640 loads)
*Arm & Hammer "Super Washing Soda" - in some stores or may be purchased online here (at Meijer.com). Baking Soda will not work, nor will Arm & Hammer Detergent - It must be sodium carbonate!!

We mix ours up in a big 5 gallon bucket like this one that my hubby picked up at Home Depot. They are cheap and a great secure way to store so much laundry soap at once. And since you dilute it by half with water in a smaller container to use, it really makes 10 gallons for just a few dollars. 
 Thanks so much to the Duggar Family for sharing this recipe on their website. It has been a blessing in our growing family as another way to save money.


Have a wonder rest of the day everyone.


Christina xo