Wednesday, July 30, 2014

Congratulations Baby Card

 I love how this card turned out!
Do you see anything different about it?
Are you wondering where the fancy circle came from?
What die it is from?
 Its from the Labels Collection framelits and so simple to crop.
All you do is cut your card stock with the big shot as usual. Then turn the framelit 90 degrees.
Here is a picture from the blog that I first found the idea on:
Pretty easy, right? 
One set of framelits and 2 different shapes!
The inside of the card is pretty fun, too! 
I stamped a bunch of stars in versa mark, gave it a few minutes to dry and then embossed "so happy for you!" in gold.

Happy Stamping!

Tuesday, July 29, 2014

Celebration Card and CCCO6

It's crazy to think that I've been doing these fun challenges for 6 weeks now.
Seriously, where does the time go? 
I guess time really does fly when you are having fun. :)
Sorry, that was corny.

This week we were given a color challenge instead of a sketch!
So fun!
Basic Black, Bermuda Bay and Crushed Curry! What awesome colors to play around with. 
I'm an aqua/teal kind of girl so I love bermuda bay and I just can't get enough of crushed curry. And adding black grounds things and adds a modern touch. In my opinion, at least!
 I saw this card idea in the new Stampin' Up! catalog and thought it was so fun. Imagine receiving this in the mail. I know it would make me giggle and smile and even throw a little bit of the confetti in the air....knowing that "Martha" our iRobot can clean it up for me, of course. Ha!
 This card is so simple. I cut whisper white card stock at 4.25"x11 and scored at 5.5" for my card base. Stamped "celebration" from the Project Life by Stampin Up! set in the three challenge colors and then made up a little baggie of confetti.  
To make the baggie I used a cello bag from a past My Paper Pumpkin by Stampin' Up! and sewed two new side seams to make it smaller. (I tried using snail but you could see it through the bag and it didn't look very good. Multipurpose glue (the white bottle with green lids) might work but I didn't try it out.) I then filled the baggie with confetti cut from the challenge colors using my favorite fringe scissors, closed it up with some wash tape (another Project life item) and attached it to the card base using glue dots.

Give it a try! 
Happy Stamping!

Thursday, July 24, 2014

How I Store My Finished Cards

Hi Guys!
I wanted to do a quick post on how I store my finished cards.
I love stamping and try to do it as often as possible. 
Sometimes that means a card a day and the great thing is I always have plenty of cards on hand when I need one.
This could be a bit of an organizational nightmare to have so many cards and trying to find that perfect one when it's time to send someone a card or attach one to a gift.
But with a little organizing it's a dream come true.
 I bought this plastic box from Target a year ago and it is the perfect size for my handmade cards.
The dividers are made of So Saffron card stock and some DSP cropped with the Labels Collection Framelits and then cut in half. 
I used my label maker with clear label tape to label the dividers and stapled it onto the card stock.
 After I make a card it goes behind the right divider and is ready to go! I keep most of my envelopes in a matching basket that sits on a shelf right next to this one. If I make a hand made envelope or one lined with pretty DSP to coordinate with a card I'll then put it in with the cards.
I find it is easier to flip through cards and not have extra envelopes get in the way. 

And that's how I organize my finished cards!
Hope you find this helpful!

Happy Stamping!

Wednesday, July 23, 2014

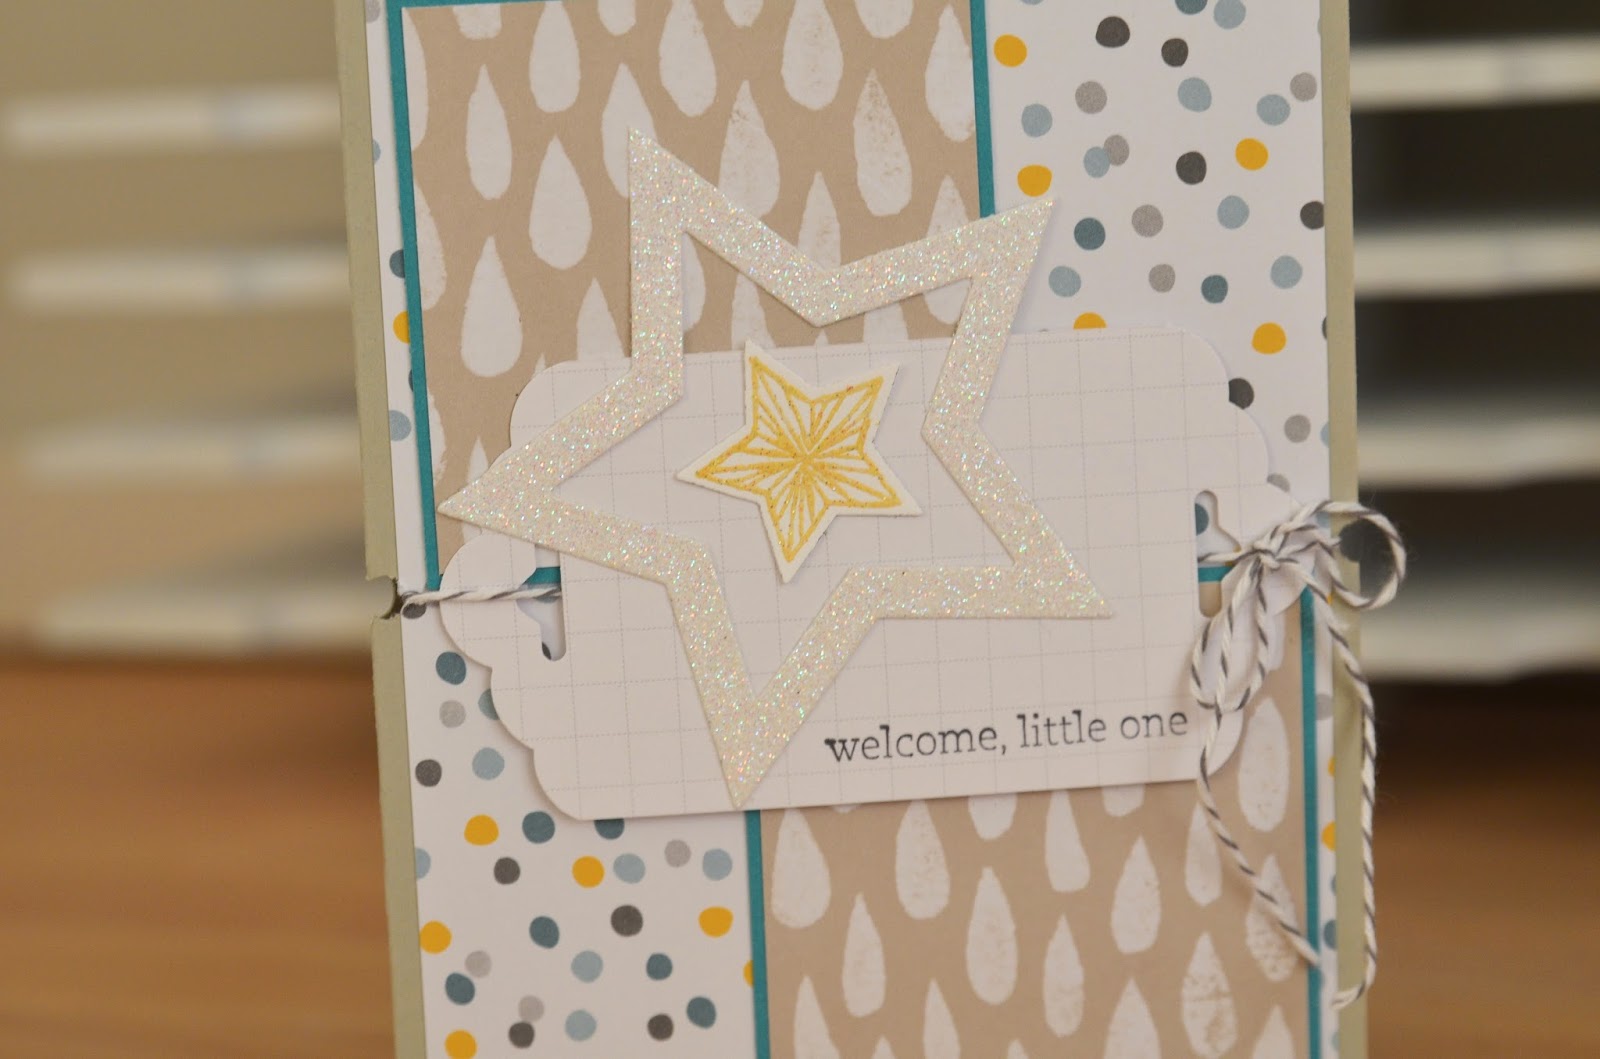
Welcome, Little One and CCC05

It's time for another Creative Challenge Club sketch!
These have been so much fun.
I think what I love the most about using a pre-designed sketch is that the overall layout design has been done for me and I get to sit down and have fun flipping through my paper, stamps and embellishments. I'm normally stamping during nap time or at the end of the day and a bit tired so using a sketch is very relaxing mindless work allowing me to spend more time on the rest of the card design.
Here's sketch CCC05:
And here's what I came up with!
Before I got started I flipped through my box of cards to see if there was any occasion that I was getting low on. Baby boy cards were needed so that is what I did! 
My next step was to flip through my DSP and pick out what I wanted to use. I came across this paper from the Moonlight Designer Series Paper Stack and it screamed baby boy at me. 
After I pick my DSP, then I decide on a card base and other card stock needed for layering pulling colors from the DSP. 
Die cuts, punches, stamps and embellishments are decided on last and then gluing it all together. :)
(I say glue and sometimes that means glue, the multipurpose liquid glue that Stampin' Up! sells, and sometimes I use snail. It all depends on what kind of hold I think I need.)
Tip: Before gluing or taping anything together layer it all up how you think you want it on your card and make sure it all works. It will save you a lot of time having to pull things apart if something doesn't look quite like you thought it would.
 My center is cropped with the scalloped tag punch by Stampin' Up! Trim your paper to 2" wide by whatever length you want and punch BOTH ends to get this fun little shape.

 I am absolutely loving my Star Framelits. The are the best and I use them all the time.
Now I just need someone to have a sweet baby boy!

Happy Stamping!


Monday, July 21, 2014

Clean and Simple Banner Stamp

What a great card this is! 
I first saw the idea on Pinterest and just loved it so I came up with my own version.
 There is nothing more to this card than three banners stamped on a Whisper White card base accented with rhinestones between each banner. The Happy Birthday is from Teeny Tiny Wishes (love that stamp set!)
My little tip is to use a stamp-a-majig to line up your banner perfectly. Stamp the middle flag first to fine the center of your card and then position the right and left banners as an easy way to keep the image centered. With handmade, though, always remember it really is OK if things aren't perfect. :)

Happy Stamping!


Friday, July 18, 2014

Doily Birthday Card

Hello Friends!
I love the colors that I used in the card. 
The designer series paper (DSP) is Stampin' Up! but from a past catalog. Isn't it great? 
I love how all of the colors look paired together on the Pool Party card base.
 The doily softens up the hard lines and makes it very feminine. 
I love how with Stampin' Up!  you can match your ink to your paper. My greeting was stamped in crumb cake to match the polka dot DSP.
And the perfectionist in me wants to point out that my rhinstones are crooked. :) 
Ever happen to you?
Embrace the imperfect especially when it comes to handmade.
All of the imperfect details when it comes to handmade makes it even more special.

Happy Stamping! 


Thursday, July 17, 2014

happy o' birthday

Isn't this card so cute and simple?
I used the banner flag punch and created little banners across the card base, added a rhinstone between each frag for a little added bling. 
She's (I guess it's a girl!) shinny and sweet and such a fun card.

Happy Stamping!

Wednesday, July 16, 2014

on your BIRTHDAY...

 I have another birthday card for you today!
Like I said on Monday, you can never have too many birthday cards ready to go!
I love the black, very vanilla and crumb cake color scheme on this simple card. 
I followed the the DSP's lead on choosing my color scheme and love how it turned out. 
It's the perfect gender neutral birthday card. 

Happy Stamping!

Tuesday, July 15, 2014

Hello and CCC04 Sketch

I have fantastic cards for you today featuring layers of beautiful flowers.
The stamps are from the Flower Patch bundle and I must stay it is an all time favorite set! 
I love photopolymer stamps and I love stamps with with dies or punches that make it oh so easy to perfectly cut them out.
Here's this weeks sketch:

And here are the TWO cards I made!!

 I love the bold colors and graphics on these cards. 
This one features the Sweet Taffy DSP and Back To Black DSP on Old Olive card stock.
 I love the red, purple, yellow green and black together. 
 And after giving it much thought and playing around with different ideas for greetings I decided the "hello" was all it needed. I played around with tucking it under the flowers but it just didn't work so in the end I wrapped the banner with wisteria wonder bakers twine. 
Just what it needed!
And did you notice the fringe? 
I mentioned a several post back how happy I was that I added the fringe scissors to a previous order and I'm still just as happy! I love the texture and FUN that it adds to the card.
As I was flipping though my DSP I saw these big bold polka dots and just couldn't decided between the purple or yellow...So I didn't decide! I made TWO!

There's not much to add about this card since it is basically the same as the first card. 
The large polk dot background is from the Flower Pot DSP, I used the same Back to Black DSP as on the first card and on this one I had used a scrap of the large purple polka dot as on the first card for the fringe until I had a major glue mishap!
As in glue oozing out from under the fringe and when I tried to clean it up I ended up tearing the fringe. After carefully taking the layers apart I added this smaller polk dot instead. It's all layered on garden green card stock.
It was touch and go for a while but it all worked out!

Happy Stamping!


Monday, July 14, 2014

YAH Happy Birthday!

There's no doubt that I make more birthday cards than any type. 
I think most people need more birthday cards than any type....maybe with the exception of a good Thank You card because after all, sending a Thank You note to someone is the polite thing to do. 
I'll get off my soap box now (because I could go on and on about the importance of saying Thank You) and talk more about this sweet card.
I love this vintage little truck. And since it is an outline, you can color it any color you want.
I always love seeing the really old aqua blue pick-up trucks and since there was a shade of blue in the designer series paper that I used I water colored my truck blue.
I cropped some banners using the banner framelits die, used some of the accent pieces from the circle card thinlits set and came up with this sweet little birthday card.

Happy Stamping!

Friday, July 11, 2014

Mason Jar Cards


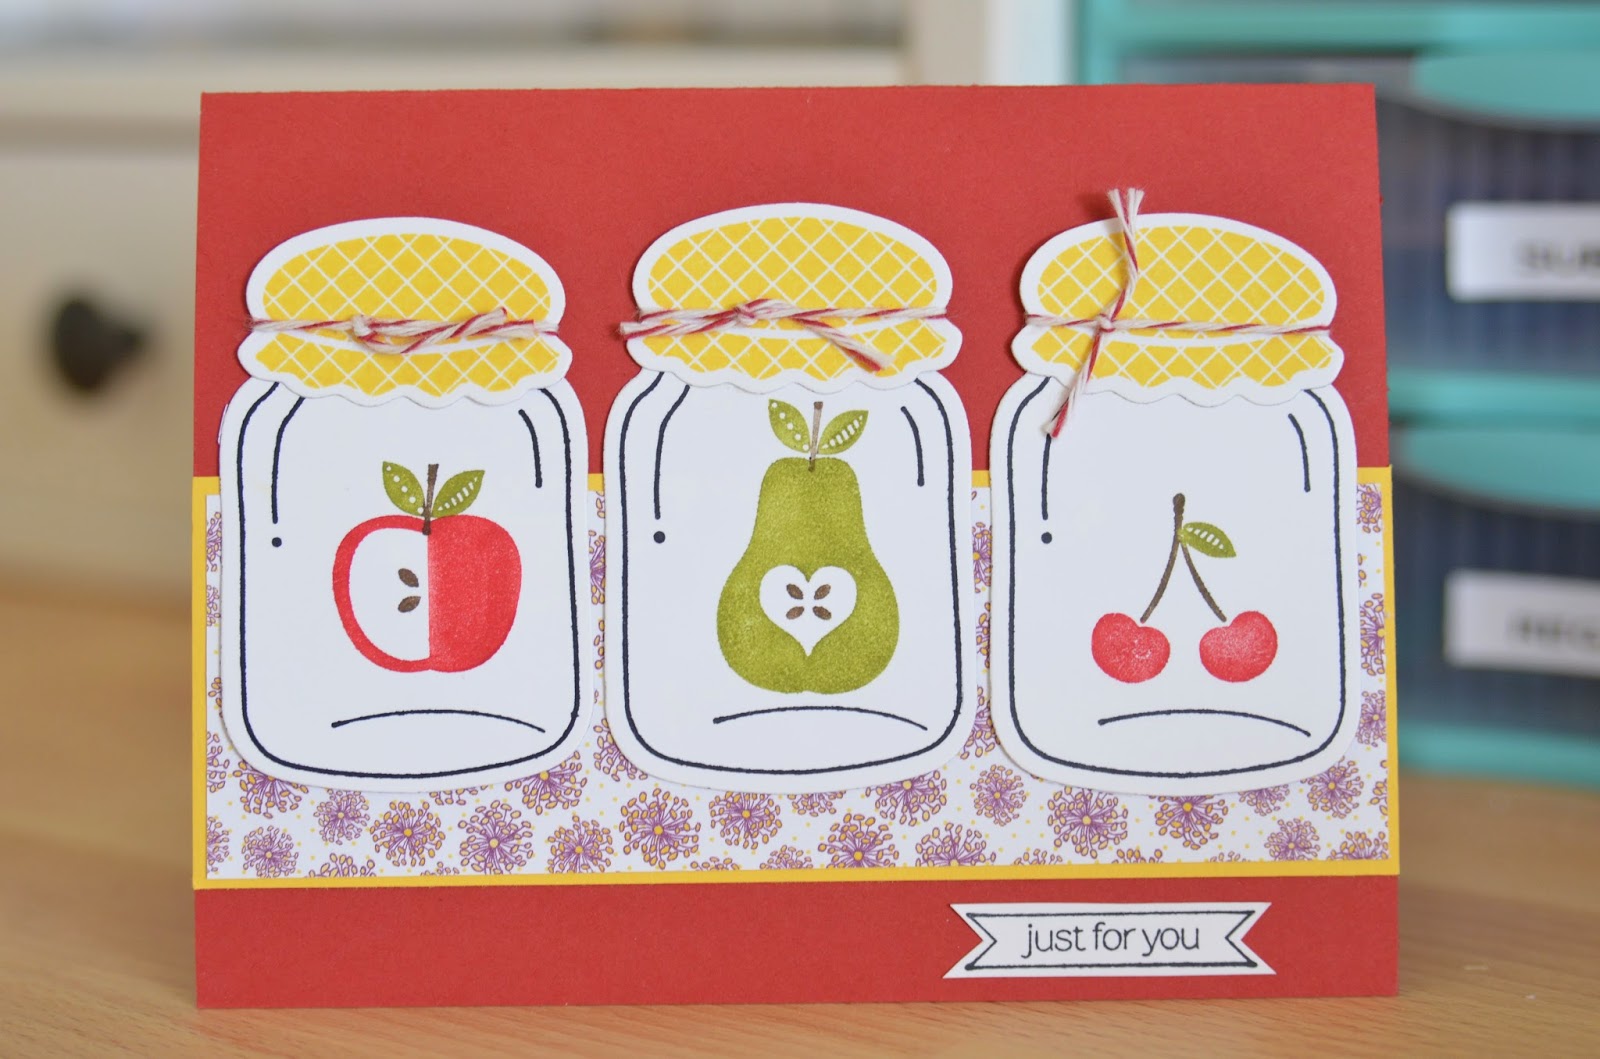
Today I have two cards featuring mason jar to share. 
I love this stamp and die set. It's just too cute!

 I love all of the layers and elements that this happy card features.
Did you notice the texture on the card base? I used my simply scored board to do that. So easy and unique and adds so much to the card.

I love the row of 3 little mason jars sitting together as if they are all lined up on a shelf. 
Again this card has lots of layers going on but still very simple. 
Stick a gift card or money inside for almost any occasion and you are all set!

Thanks for stopping by!

Wednesday, July 9, 2014

Watercoloring Techniques

Today's card features a little water coloring action. I love water coloring stamped images. 
It makes me feel like an artist! 
An easy way to get shades and highlights is to use several different shades of ink. I find it easier than layering up one color. 
"Your Goodness Makes Me Grateful" is such a great sentiment! The inside of the card says "Thank You" and I can't wait to have a reason to send it to someone!

Thanks for stopping by!

Tuesday, July 8, 2014

Happy Birthday Card and CCC03 Sketch

Hello!
It's time for another Creative Challenge Club Sketch!
I'm really enjoying these challenges.
Here's this weeks sketch:


And here is what I came up with:
 What a fun card this is! It has so much going on but in a good kind of way!
Our middle son's birthday is coming up in just a few weeks so it was the perfect time to make him a special card. All of our children love handmade cards and carry them around with them until they are tattered and worn and very loved looking. I love making them cards and seeing them smile.
I thought this DSP was perfect for a 5 year old's birthday card. I don't really have any kiddie type stamps but who needs one when you have paper like this?!
Yep, that's the glimmer paper from Stampin' Up! on a boy's card. For a 5 year old boy shinny glitter is welcomed. I'm sure we will hit an age that it won't pass anymore. The "Make a Wish" is embossed in silver and I love how the yellow thick bakers twine really pops on the front of this card.
 My little man actually requested a garland in his card after seeing one in a Father's Day card I made and also the "Sending Good Thoughts Your Way" card I posted last Friday. He doesn't know he's getting one in his card but I know he will be excited about it.
Do you like the stamp I embossed in silver?
It's actually 3 stamps!
The "seize the cake" and "happy birthday" are from the same stamp set and the row of stars are from a past paper pumpkin. Didn't plan on the stars but when I stamped the other two stamps the gap in the middle was bigger than I was going for. The stars were the perfect solution.

Thanks for stopping by!

Monday, July 7, 2014

Sending Good Thoughts Your Way


So much texture and so many layers!
I love this card design.
I used a large polka dot embossing folder directly to the front of the card, layered on a banner framelit die cut with lots of bracket punches and a piece of burlap ribbon (craft store) behind the greeting. To add more texture I scattered assorted sequins across the front of the card as well.
 And on the inside?
There's a party going on! 
What a fun surprise to open a card and find a garland! 
I know it would make me smile. :)
Is was a get well card for my dad so all of the kids signed it. I love seeing their cute handwriting. 
I'm sure it will bring a smile to my dad's face as well!
Thanks for stopping by!

Friday, July 4, 2014

Creative Challenge Club

Good Morning!
Have you ever created a card from a sketch?
It's might just be my new favorite way to approach a card design.
There's a new blog in town called Creative Challenge Club who post a sketch each Monday. 
Here's this past Monday's sketch:

And here's what I came up with!

I decided to skip the stars and go with flowers instead and love how it turned out. The cute little bird is retired and I haven't used the set in a while but glad I pulled it back out. 
Isn't he cute?
The reddish orange head was inspired by a bird we had hanging out on our back patio. The kids named him Herman. So cute! 

The DSP is currently in the new Stampin' Up! catalog and so are the flower dies. 
They part of the Flower Patch bundle. The coordinating stamp set was on back order so I just played around with the dies. Fun!
Isn't that fringe awesome? I'm so happy I added the fringe scissors to my last order. What a fun way to add texture.

Thanks for stopping by and Happy Stamping!

Thursday, July 3, 2014

I'm Back!

Hello!
It's been a long time since I posted anything but I'm back! 
Well, I hope to be back :)
I've decided since my all time favorite hobby is stamping and paper crafting then THAT is what I should post about. I've got lots to share and hope to get a few post scheduled per week.
I'm still every bit as busy with our 6 little cuties and we are also about to start school up next week (going to try a year-around schedule and decided doing school during the hottest months and having our first break once the temps start to drop again made much more sense for us). 
With all of that said, honestly, there will but times I don't post but I do hope to get a few scheduled in advance per week so I don't have to make it to the computer every few days to type out a post. 
Oh, and my craft room? 
If you've been following along you know I've been working on it for a long time and guess what?
I've got a new desk, hutch and things are looking awesome. It's pretty much done besides rearranging here and there figuring out what works best for the way I craft. :)
I hope you'll stick around, I've got so much to share!