Monday, January 28, 2013

Why not Easter, too?

This past Friday I was flipping through a new Pottery Barn catalog and as I was silently oohing at their Easter tablescapes I couldn't help but wonder why I don't go all out with the table for Easter? Christmas, Thanksgiving, Summer, Fall...check check check check.
Pinned Image
betweennapsontheporch.blogspot.ca
I want to blame it on the fact that I don't have a lot of Easter decor. But I know that isn't a very good excuse. If I wanted Easter decor, I'd buy it. It isn't like I entered into our marriage with stuff for every other season and occasion. I either made it or bought it. 
Pinned Image
http://www.centsationalgirl.com/2010/04/blues-and-branches-a-spring-tablescape/
I think I can honestly say that with the emphasis we place on Lent and all of the giving-up that we do as Catholics and after really reflecting on what Jesus went though when He died on that cross and everything He went though leading up to it that I'm never like "Yahoo, let's celebrate!" But I know Easter isn't necessary celebrating Jesus' death, it is celebrating His resurrection. And that does deserve celebration and a beautiful table and nice dinner. It deserves china and conversations at the table. (ok, with 5 kiddos we always have chatter at the table but you know what I mean.)
Pinned Image
http://www.marthastewart.com/274529/easter-table-crafts-and-favors/@center/276968/easter
I remember someone complementing a nice cheery top that I was wearing one time at church during Lent and said it reminded them how we should be cheery and keep a smile on our faces even during Lent, a much more somber time of the year. It is so true. As our tummies are rumbling from eating a little less and as we are craving favorite foods that maybe we gave up, we should smile. 
Pinned Image
http://grandmas-dreams.tumblr.com/post/20733715630
Jesus died on the cross to open the Gates of Heaven for us and that IS something to celebrate.
Pinned Image
no source found

Pinned Image
http://www.flickr.com/photos/44953325@N06/4483630184/in/photostream
My point? I'm setting a pretty table this year! I don't have a lot of Easter decor and know that it wouldn't be "me" to stick bunnies all over the house but the table? Oh, how I love a beautiful table. If I had to choose one place in our home to decorate and one place only, hands down it would be the table.

Hope y'all had a lovely weekend!


Monday, January 21, 2013

Come dream with me...

Gooood afternoon!
This past weekend I had some free time to work on my little studio spruce-up!
Thanks to Better Homes and Garden's I Did It story in the February issue, I now have a much clearer vision of how I want the space to look when it is finished.
 Yah!

Come dream with me!

Saturday and Sunday I whipped up this cute little fabric banner using scraps that I had on hand. After hanging it I decided it should span across the whole length of my desk. Off to the fabric store I need to go for something with the color yellow in it!

The cork board WAS above my sewing desk but I decided it would look nicer above my hutch. It still needs to be hung but so far I'm liking it!

I had been considering a fabric skirt on my desk since there is a ton great storage space under there but just wasn't sure...until BHG came along featuring this amazing craft room.
I certainly never would have dreamed of doing ruffles but isn't it perfect? At this point I can't even image the yardage of fabric it will take and since my budget is limited it is lower on the To-Do List. But someday, I think it will be perfect! And the color fits my color scheme perfectly!

I have one more rod to hang on my punch wall. I found little baskets that will be perfect for holding ribbon!
BYGEL Wire basket IKEA Can be hung on BYGEL rail, mounted to the wall or the inside of a kitchen cabinet frame or door. Saves space on the countertop
It is the BYGEL Wire Basket from Ikea and with a price tag of $2.99 each you can't go wrong!
I love my very little sewing desk. It use to be white and once-upon-a-time ago it was a bedside table in our master bedroom. I spray painted it aqua and changed out the wooden knobs for some old beat up (beat up from being tossed around in a box in the garage! ha!) ones for a quick update. From this picture you can't see it but sort of behind my sewing machine is a little bucket of scissors and a little wire bird basket of threads. If my desk were larger, having stuff out on it would probably fine but since it is so small I'm constantly knocking them over with fabric every time I sew something. 

Once again, thanks to BHG, I have a solution that is better than ever!
Where my cork board once hung there will be white shelves sitting on yellow brackets! It will be perfect for my scissors and threads along with other things like buttons and baskets. And speaking of baskets, I want some! I came up with the idea of having "project baskets." Instead of having multiply projects that I've started laying around until they are done, I will store them in baskets on my shelves above the sewing desk! And don't ya just love those fabric ruffles on her baskets? I hope to do something just like that!
Let's head back over to my desk again. After deciding I wanted YELLOW throughout my studio, I spent some time looking at ways to add little pops of the color all over the room. One way to do that on the cheap is to spray paint the lids of these baby food jars.  Perfect!
And the back of this cabinet will also get a pop of yellow with the help of some oil cloth or fabric.

Isn't my little shipping station the cutest? Like the pop of yellow? Yeah, that wasn't planned that way but I was pretty excited when I realized the picture frame, tiny vintage film case and the shipping supplies were all yellow!
And last but not least this window needs some lovin'. I happen to have some lacy white curtain panels stored away that will be perfect.

Thanks for coming along and I can't wait to give you a tour of my finished studio soon!
bye!

Thursday, January 17, 2013

no. 5 (aka diy freezer paper stencil)

Last week on a bit of a crafting whim, I decided our couch needed a new pillow. As an avid crafter that meant I already had everything on hand that I would need. Don't ya just love that? I even had a pillow case already sewn up waiting to be prettified. 

So while the kids napped/had some quiet time I got to work!
I gathered the essentials first!
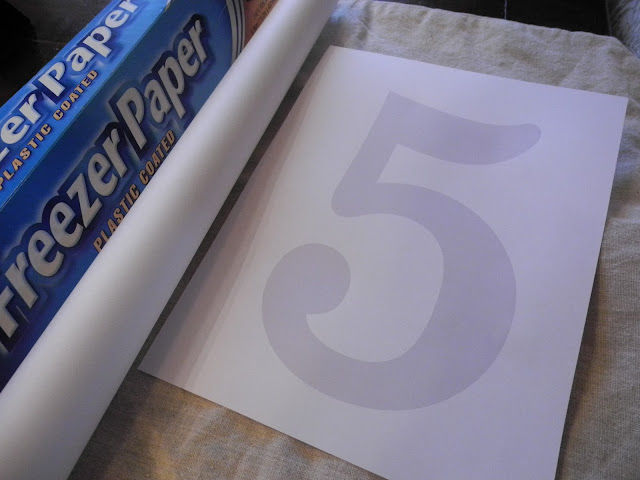
 Now onto the pillow...This was my first freezer paper stencil and it was so easy and fun that I know I'll be making more stuff using this technique in the future. To get started I printed a number on the computer sized how I wanted it. Then all you do is cut the number out and trace it to the non-glossy side of freezer paper.
Cut it out of the freezer paper with a craft knife (don't forget the cutting mat- just sayin') and iron it to the pillow- glossy side down. Oh, and don't for get some cardboard and heavy paper or whatever under the number before you start painting. Otherwise the paint will go through the fabric and onto the back of the pillow and that wouldn't be very pretty!

I grabbed some black paint from our garage. It wasn't even craft paint! It was left over from our dresser-to- TV console DIY project (a post will come eventually once I get the top of the console decorated!).
Then very carefully pull off the freezer paper while the paint is still slightly wet.
Admire your hard work while the paint dries!


Slip a pillow in the case and DONE!  Told ya it was easy!
I love our new pillow! I love our cozy "wintery" living room! Love it, love it, love it!

What have you been up to lately?

Thursday, January 10, 2013

10 on 10

I am so glad I decided to do this today! I've never done a 10 on 10 (10 pictures over the course of 10 hours on the 10th of the month). It was fun running around taking pictures every hour. Before I share, I will admit the first two pictures were taken at 8:30 when I decided to do this! (But they are what I did at those times!)

Let's get started:
6:30 am
Rise and shine! Time to start the day. After prayers it's coffee time. Oh how I look forward to that first cup of coffee every morning. The first cup always taste the best!
7:30 am
While everyone is waking up and watching a few cartoons, I take some time to flip through some new reading material. Isn't that hand stamped card stunning? My demonstrator sent it along with my catalogs. It made my day yesterday!
8:30 am
Everyone is finished with breakfast so I tackle the dishes. My day always goes smoother if I get little chores like that out of the way first.
9:30 am
My little student busy with math.
10:30 am
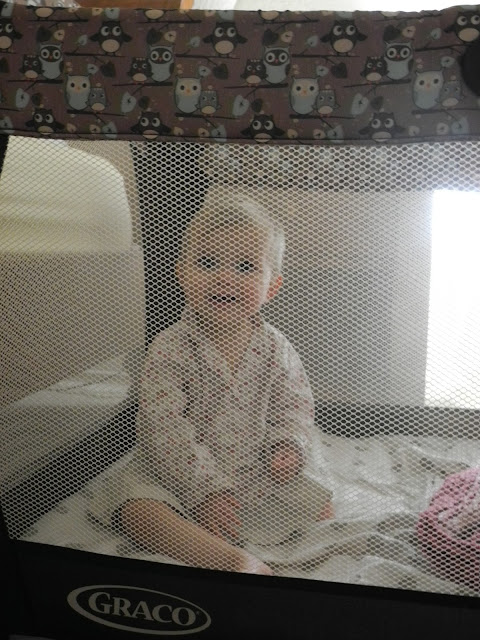
Baby is up from morning nap! Okay, isn't this a fun picture? The mesh on the pack and play gave the picture a neat "overlay."
11:30 am
Getting everyone's lunch ready. My smallest tike is having toast with peas and carrots. Yum!
12:30 pm
Craft time during nap time
While everyone is napping, I get some crafting in. I copied the feathers on the right (that a sweet friend sent me) to make my own sheet music version to add to my sister's birthday gift later this month. I thought it would be a fun take on the standard bow!
1:30 pm
Time for more coffee! 
2:30 pm
I took advantage of some Pure Privilege points from Aveda and got some fun free products to try. 
1. Mango lip gloss
2. Tinted Moisturizer
3. Lavender Soy Candle
3:30 pm
Stampin' Up! Spring catalog is the best. I wish I could order one of everything! It will be hard to narrow down my selection! I love when a new catalog comes out. They are so full of inspiration and fun products. 

That's it! My 10 pictures taken every hour for 10 hours.
See ya back soon!


Monday, January 7, 2013

Breakfast pizza that will knock your socks off


I found this recipe on Pinterest, go figure. It looked pretty good so I did the next logical thing and pinned it. 

Surprising, right?

This past Saturday while I was busy in the kitchen cooking dinner I realized something unusual. It was fairly quiet and no one was whining that they were hungry/thirsty/someone took my toy/etc/etc/etc. 
I enjoyed that moment with my whole heart knowing it may never happen again. ha! 


This recipe is super easy and because I actually changed it up a bit, I don't feel the need to link to the original. Some of my toppings are different and my dough is different so I feel like I can call it my very own slice of perfection.
Basically all it is is homemade pizza dough, scrambled eggs, bacon, cheese and gravy. The end.
It's that easy.
Here's the recipe for my no-fail pizza dough that I've been making for a very very very long
time. 

1 package active dry yeast
1 teaspoon granulated sugar
1-1/4 cups warm water (105-115 degrees F.)
3-1/3 cups unbleached, all-purpose flour
1/2 tablespoon salt
Non-Stick Spray

In a medium size bowl, dissolve yeast and sugar in warm water. Let stand until foamy, about 3-5 minutes. In a food processor with the dough blade add flour and salt. Pulse a few times to mix. With food processor on, slowly add water/yeast mixture to flour/salt mixture. Once water is completely absorbed by flour and a dough ball has formed and cleans the sides of the work bowl, process for an additional 30 seconds to knead dough. Dough may be slightly sticky. Coat dough ball with non-stick spray and transfer to a large bowl. Place bowl in a warm place for about 45 minutes to rise. After 45 minutes, punch dough down and let rise again for 5-10 minutes (or until you are ready to make your pizza). Roll out on floured surface to desired size. Poke with a fork and cook for about 15 minutes at 400 degrees F. until set.

Now, for the gravy!
I don't have a recipe. I never have but here is how I always make it.
All you do is put a few tablespoons of butter in a skillet. Once melted add a couple spoon fulls of flour and whisk together. Then over medium heat add milk whisking until smooth. If the gravy mixture thickens too fast on you and it isn't smooth yet you can turn the heat off until you get it smooth, them turn the heat back on to continue thickening. Add milk to thin as needed. Season with salt and pepper (or Tony's if you can get it!) to taste.

Okay- here is what makes this recipe so yummy. Not only does the pizza have gravy on top when served, it also has a thin layer that acts as the "sauce" on top of the dough. 

So now that your dough is out of the oven, spread a thin layer of gravy on it and then add your scrambled eggs, bacon and cheese. Heat back up in the oven until the cheese is melted. Serve with gravy!

That's it!

Short on time? The dough and toppings can be made up in advance. Come breakfast or dinner (or lunch even?) assemble, cook and serve.

Blessings to all!


Thursday, January 3, 2013

2nd annual hot cocoa party

How do you celebrate a birthday with a house fully decked out for Christmas? You have a Hot Cocoa Party! Last year when our little Lillian was about to turn the big 1, I came up with this idea to give her a Hot Cocoa themed party each year...hopefully whens he gets old enough to have an opinion she won't mind carrying on this tradition.
 Happy Birthday Sweet Girl!
 It's fun. The color scheme coordinates with Christmas colors. And who doesn't like hot cocoa?
This year I came across this cute cupcake idea on pinterest. What would we do without pinterest?
Doesn't it look exactly like a little cup of hot cocoa? Except this one is better! You get to eat the candy cane handle! They were a hit and so easy to make- I will definitely be making these again! 

Hope you had a wonderful New Year!